为 Databend Rust Driver 实现 Python Binding

HOW? PyO3 + Maturin

Rust 和 Python 都拥有丰富的包和库。在 Python 中,很多包的底层是使用 C/C++ 编写的,而 Rust 天生与 C 兼容。因此,我们可以使用 Rust 为 Python 编写软件包,实现 Python 调用 Rust 的功能,从而获得更好的性能和速度。

为了实现这一目标,PyO3 应运而生。PyO3 不仅提供了 Rust 与 Python 的绑定功能,还提供了一个名为 maturin 的开箱即用的脚手架工具。通过 maturin,我们可以方便地创建基于 Rust 开发的 Python 扩展模块。这样一来,我们可以重新组织代码,使用 Rust 编写性能更好的部分,而其余部分仍然可以使用原始的 Python 代码。

rust-rewrite

Databend 目前有针对 Rust、Go、Python、Java 的多套 Driver SDK,维护成本颇高,上游一旦出现更新 SDK 便会手忙脚乱。 Rust 能提供对其他语言的 Binding 实现一套代码到处使用,而且又能获得更好地性能和速度,何乐而不为呢?

本篇文章我们关注如何在 python 中调用 Rust 开发的模块,以此来为 Databend Rust Driver 实现 Python Binding。

简单的 Demo

这里我们以官网提供的最简单的方式来做个演示。

1
2
3
4
5
6
7
8
9
10
11
$ mkdir string_sum
$ cd string_sum
# 创建 venv 的这一步不能省略,否则后续运行的时候会报错
$ python -m venv .env
$ source .env/bin/activate
$ pip install maturin
# 直接使用 maturin 初始化项目即可,选择 pyo3,或者直接执行 maturin init --bindings pyo3
❯ maturin init
✔ 🤷 Which kind of bindings to use?
📖 Documentation: https://maturin.rs/bindings.html · pyo3
✨ Done! Initialized project /Users/hanshanjie/rustProj/string_sum

image-20230527100715138

这个时候,我们可以得到一个简单的 Rust 项目,并且包含了调用的示例,打开 src/lib.rs:

1
2
3
4
5
6
7
8
9
10
11
12
13
14
use pyo3::prelude::*;

/// Formats the sum of two numbers as string.
#[pyfunction]
fn sum_as_string(a: usize, b: usize) -> PyResult<String> {
Ok((a + b).to_string())
}

/// A Python module implemented in Rust.
#[pymodule]
fn string_sum(_py: Python, m: &PyModule) -> PyResult<()> {
m.add_function(wrap_pyfunction!(sum_as_string, m)?)?;
Ok(())
}

可以看到 pyfunctionpymodule 两个 Rust 的宏,#[pymodule] 过程宏属性负责将模块的初始化函数导出到Python。它可以接受模块的名称作为参数,该名称必须是.so或.pyd文件的名称;默认值为Rust函数的名称。#[pyfunction] 注释一个函数,然后使用 wrap_pyfunction 宏将其添加到刚刚定义的模块中。

我们无需修改任何代码,可以直接执行下面的命令测试:

1
2
3
4
5
6
# maturin develop 会自动打包出一个 wheel 包,并且安装到当前的 venv 中 
$ maturin develop
$ python
>>> import string_sum
>>> string_sum.sum_as_string(5, 20)
'25'

构建 Databend Driver 的 Python Binding
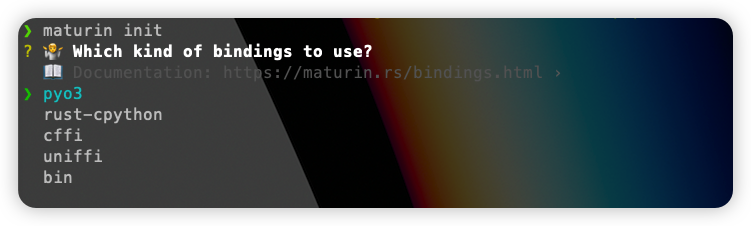
初始化项目

bendsql 根目录下创建 bindings/python的 rust 项目:

1
2
3
4
5
6
7
8
$ cd bendsql 
$ mkdir bindings & cd bindings
$ mkdir python & cd python
$ python -m venv .env
$ source .env/bin/activate
$ pip install maturin
# 直接使用 maturin 初始化项目即可,选择 pyo3
❯ maturin init

为了使用PyO3,我们需要将其作为依赖项添加到我们的Cargo.toml文件中,以及其他依赖项。我们的Cargo.toml文件应该如下所示:

1
2
3
4
5
6
7
8
9
10
11
12
13
14
15
16
17
18
19
[package]
name = "databend-python"
version = "0.0.1"
edition = "2021"
license = "Apache-2.0"
publish = false

[lib]
crate-type = ["cdylib"]
doc = false

[dependencies]
chrono = { version = "0.4.24", default-features = false, features = ["std"] }
futures = "0.3.28"
databend-driver = { path = "../../driver", version = "0.2.20", features = ["rustls", "flight-sql"] }
databend-client = { version = "0.1.15", path = "../../core" }
pyo3 = { version = "0.18", features = ["abi3-py37"] }
pyo3-asyncio = { version = "0.18", features = ["tokio-runtime"] }
tokio = "1"

PyO3 添加为依赖项,并使用适当的属性注解 Rust 函数(我们将在后面介绍),就可以使用 PyO3 库创建一个可以被导入到 Python 脚本中的 Python 扩展模块。

将 Rust Struct 转换成 Python 模块

databend-client 中提供了两种连接到 databend 的方式,flightSQL 和 http, databend-driver package 实现了一个 Trait来统一入口并自动解析协议:

bendsql/driver/src/conn.rs

1
2
3
4
5
6
7
8
9
10
11
12
13
14
15
16
17
18
19
20
21
22
23
24
25
26
27
28
29
30
31
#[async_trait]
pub trait Connection: DynClone + Send + Sync {
fn info(&self) -> ConnectionInfo;

async fn version(&self) -> Result<String> {
let row = self.query_row("SELECT version()").await?;
let version = match row {
Some(row) => {
let (version,): (String,) = row.try_into()?;
version
}
None => "".to_string(),
};
Ok(version)
}

async fn exec(&self, sql: &str) -> Result<i64>;
async fn query_row(&self, sql: &str) -> Result<Option<Row>>;
async fn query_iter(&self, sql: &str) -> Result<RowIterator>;
async fn query_iter_ext(&self, sql: &str) -> Result<(Schema, RowProgressIterator)>;

async fn stream_load(
&self,
sql: &str,
data: Reader,
size: u64,
file_format_options: Option<BTreeMap<&str, &str>>,
copy_options: Option<BTreeMap<&str, &str>>,
) -> Result<QueryProgress>;
}
dyn_clone::clone_trait_object!(Connection);

所以我们只需要将该 Trait 转换成 Python class ,就能在 python 中调用这些方法。Pyo3 官网中提供了转换 Trait 的方式,https://pyo3.rs/v0.12.3/trait_bounds,但是这种方式过于复杂,需要写太多的胶水代码,而且对用户也不友好,不能做到开箱即用。左思右想,为何不将 Trait 封装一个 Struct 然后将 Struct 直接将转换成 python module ?

1
2
3
4
5
6
7
8
9
10
11
12
13
14
15
16
17
#[derive(Clone)]
pub struct Connector {
pub connector: FusedConnector,
}

pub type FusedConnector = Arc<dyn Connection>;

// For bindings
impl Connector {
pub fn new_connector(dsn: &str) -> Result<Box<Self>, Error> {
let conn = new_connection(dsn).unwrap();
let r = Self {
connector: FusedConnector::from(conn),
};
Ok(Box::new(r))
}
}

这里写了一个 Connector 的 struct,里面封装了 Connection Trait,为 Connector 实现了 new_connector 方法,返回的正是一个指向 Connector 的指针,更多代码可以看这里

在 asyncio.rs 中我们就可以定义一个 Struct AsyncDatabendDriver 暴露为 python class,并定义 python module 为 databend-driver:

1
2
3
/// `AsyncDatabendDriver` is the entry for all public async API
#[pyclass(module = "databend_driver")]
pub struct AsyncDatabendDriver(Connector);

接下来就要为 AsyncDatabendDriver 实现相应的方法,而底层调用的就是 rust 中实现的 Trait 中的方法(这里以 exec 为例):

1
2
3
4
5
6
7
8
9
10
11
12
13
14
15
16
17
18
#[pymethods]
impl AsyncDatabendDriver {
#[new]
#[pyo3(signature = (dsn))]
pub fn new(dsn: &str) -> PyResult<Self> {
Ok(AsyncDatabendDriver(build_connector(dsn)?))
}

/// exec
pub fn exec<'p>(&'p self, py: Python<'p>, sql: String) -> PyResult<&'p PyAny> {
let this = self.0.clone();
future_into_py(py, async move {
// 调用 connection 中的 exec 方法
let res = this.connector.exec(&sql).await.unwrap();
Ok(res)
})
}
}

最后在 lib.rs 中将 AsyncDatabendDriver 添加为 python class:

1
2
3
4
5
#[pymodule]
fn _databend_driver(_py: Python, m: &PyModule) -> PyResult<()> {
m.add_class::<AsyncDatabendDriver>()?;
Ok(())
}

定义 python 扩展模块信息

创建 pyproject.tomlpython/databend_driver 并定义 python module 相关信息。
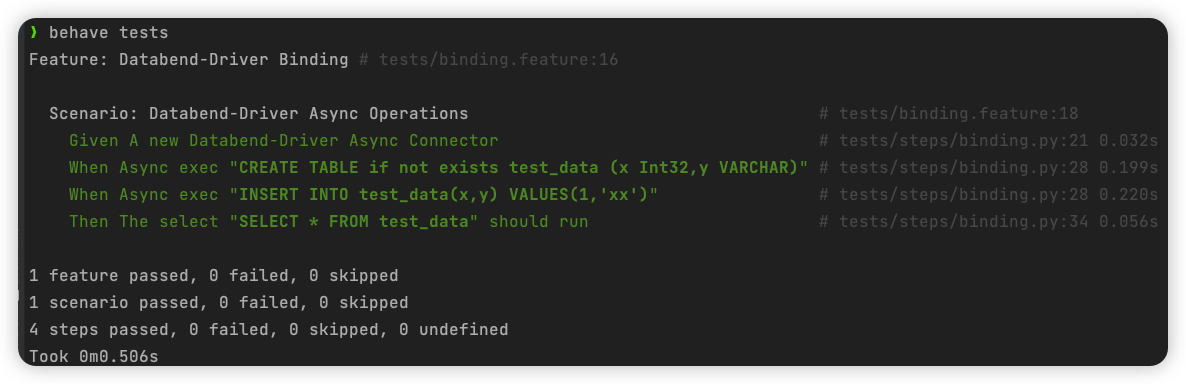
测试

这里我们使用 behave 进行测试,同时也可以看到能够以 import databend_driver 的形式在 python 项目中使用:

1
2
3
4
5
6
7
Feature: Databend-Driver Binding

Scenario: Databend-Driver Async Operations
Given A new Databend-Driver Async Connector
When Async exec "CREATE TABLE if not exists test_data (x Int32,y VARCHAR)"
When Async exec "INSERT INTO test_data(x,y) VALUES(1,'xx')"
Then The select "SELECT * FROM test_data" should run
1
2
3
4
5
6
7
8
9
10
11
12
13
14
15
16
17
18
19
20
21
import os

from behave import given, when, then
from behave.api.async_step import async_run_until_complete
import databend_driver

@given("A new Databend-Driver Async Connector")
@async_run_until_complete
async def step_impl(context):
dsn = os.getenv("TEST_DATABEND_DSN", "databend+http://root:root@localhost:8000/?sslmode=disable")
context.ad = databend_driver.AsyncDatabendDriver(dsn)

@when('Async exec "{sql}"')
@async_run_until_complete
async def step_impl(context, sql):
await context.ad.exec(sql)

@then('The select "{select_sql}" should run')
@async_run_until_complete
async def step_impl(context, select_sql):
await context.ad.exec(select_sql)

运行 maturin develop 会自动打包出一个 wheel 包,并且安装到当前的 venv 中 ,

1
2
3
4
    ....
Finished dev [unoptimized + debuginfo] target(s) in 8.71s
📦 Built wheel for abi3 Python ≥ 3.7 to /var/folders/x5/4hndsx0x7cb5_45qgpfqx4th0000gn/T/.tmpyzRsUc/databend_driver-0.0.1-cp37-abi3-macosx_11_0_arm64.whl
🛠 Installed databend-driver-0.0.1

执行 behave tests 运行测试集:

image-20230527125008830

结论

基于 Pyo3,我们可以比较方便地专注于 Rust 实现逻辑本身,无需关注太多 FFI (Foreign Function Interface)和转换细节就可以将 Rust 低成本地转换成 Python 模块,后期也只需要维护一套代码,极大地降低了维护成本。本文章抛砖引玉,只是将很少部分代码做了转换,后面会陆续将 rust driver 全部提供 Python binding 最终替换掉现在的 databend-py

HTML


-------------The End-------------

本文标题:为 Databend Rust Driver 实现 Python Binding

文章作者:cloud sjhan

发布时间:2023年05月27日 - 13:05

最后更新:2023年05月27日 - 13:05

原始链接:https://cloudsjhan.github.io/2023/05/27/为-Databend-Rust-Driver-实现-Python-Binding/

许可协议: 署名-非商业性使用-禁止演绎 4.0 国际 转载请保留原文链接及作者。

cloud sjhan wechat
subscribe to my blog by scanning my public wechat account
坚持原创技术分享,您的支持将鼓励我继续创作!
0%
;